I've touched on internet communication encryption several times. Lately, even inexpensive rental servers seem to be starting to offer "free custom SSL" services. This is likely due to the release of the Open Certificate Authority last year.”Let's Encript“Perhaps due to the influence of [the aforementioned phenomenon], SSL has now become the standard practice for publishing content on the internet.
NetOwl Inc. offers free SSL certificates using Let's Encrypt through its SSL Box service. Thankfully, this makes setting up an HTTPS environment easy and convenient.
This document outlines the steps for issuing and configuring a Let's Encrypt certificate from SSL Box on CORESERVER, a rental server that boasts low cost and high functionality.
Of course, you don't have to use CORESERVER; the free XREA server will do, and the setup method is almost the same. The setup method itself probably won't differ much even with other companies' servers.
It is assumed that the name server and DNS settings for the domain to which SSL will be applied have been completed in advance, and that the domain has been registered in the "SSL Domain Information Input" field under "Domain Web" in the server (CORESERVER) management screen.
below,Create a NetOwl accountThis process requires you to be logged in.
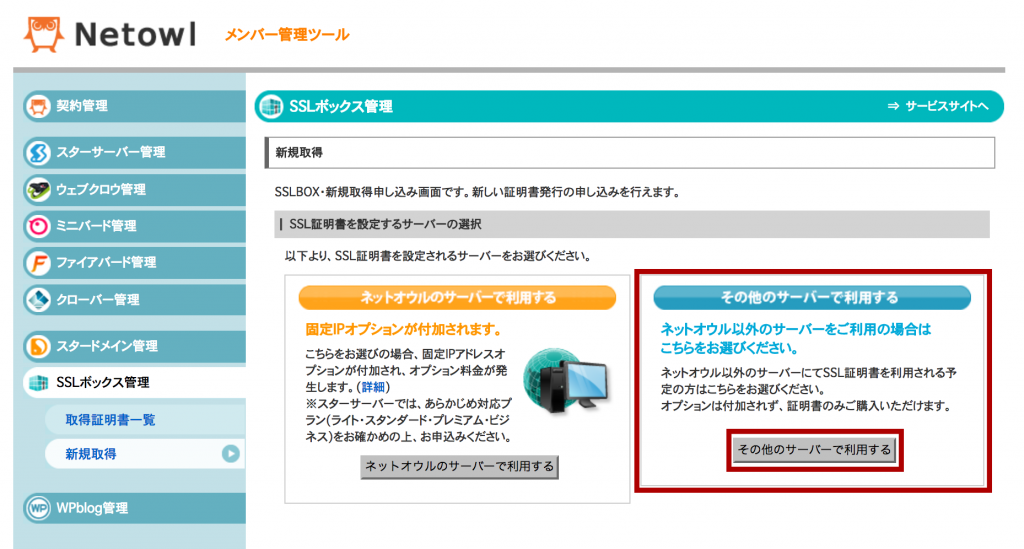
① Left menuFrom "SSL Box Management," select "New Acquisition."Then, click the "[Use on other servers]" button.
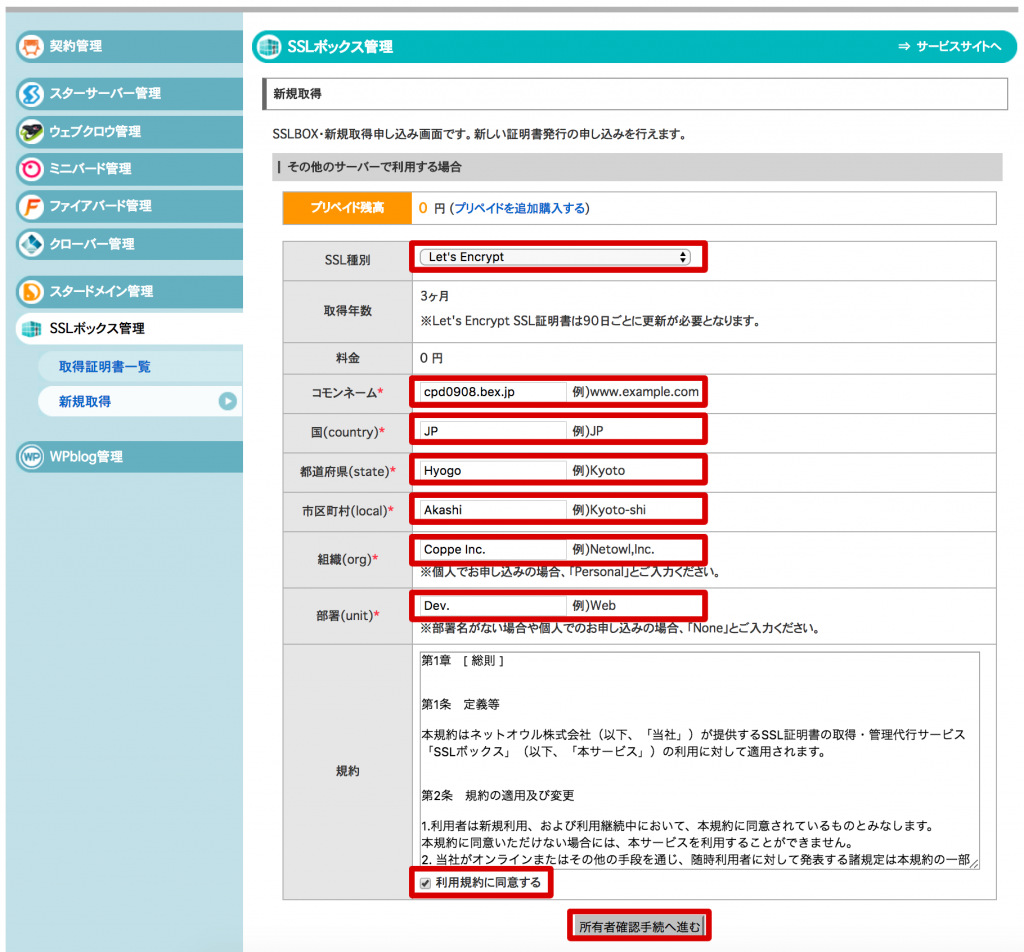
② On the "New Acquisition" screen, select "Let's Encript" under "SSL Type," and enter the required fields "Common Name," "Country," "State," "Local," "Organization (org)," and "Unit" according to the examples provided. Agree to the "Terms and Conditions" and click "[Proceed to Owner Verification Procedure]."
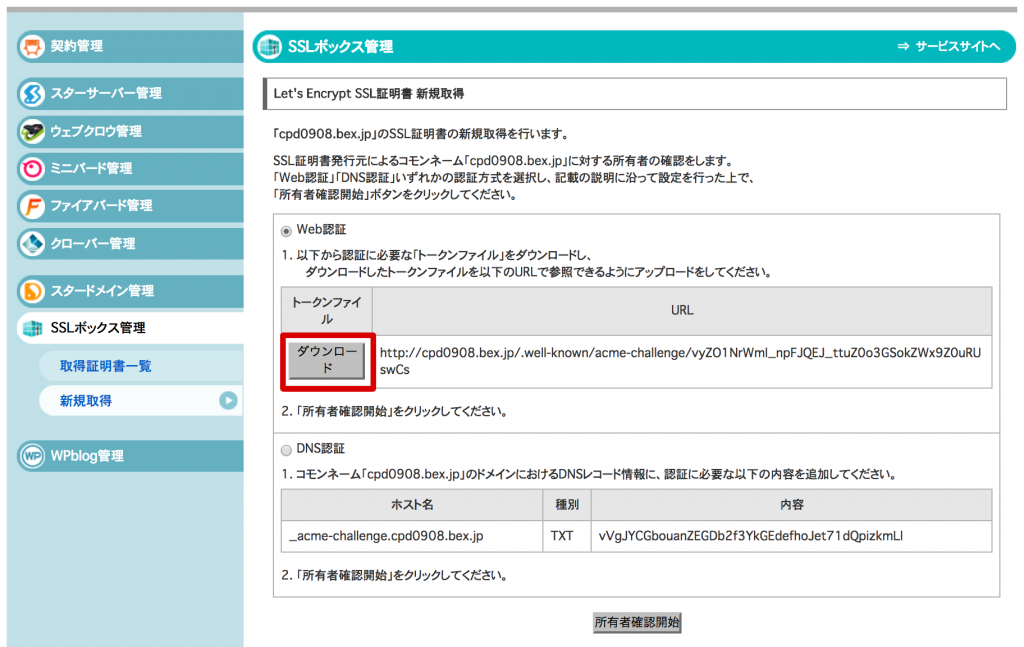
③ On the "Let's Encript SSL Certificate New Acquisition" screen, make sure the "Web Authentication" radio button is turned ON, and then click the [Download] button for "Token File" to download the file.
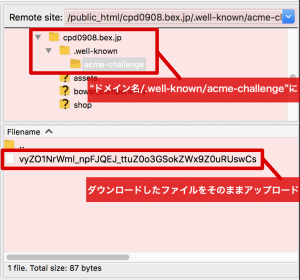
④ Launch an FTP application or similar. Connect to the CORESERVER host via FTP and create a ".well-known" folder directly under the document root that will be SSL-enabled. Then, create another folder named "acme-challenge" inside the ".well-known" folder. Upload the files you downloaded earlier into the "acme-challenge" folder.
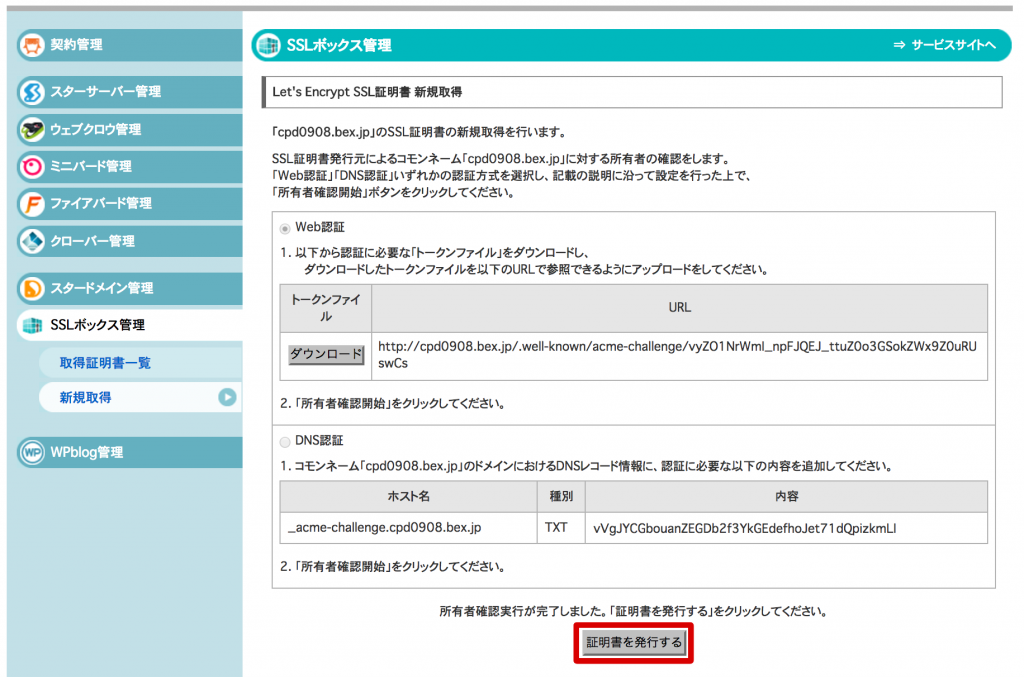
⑤ Return to the SSL Box management page and click the [Issue Certificate] button.
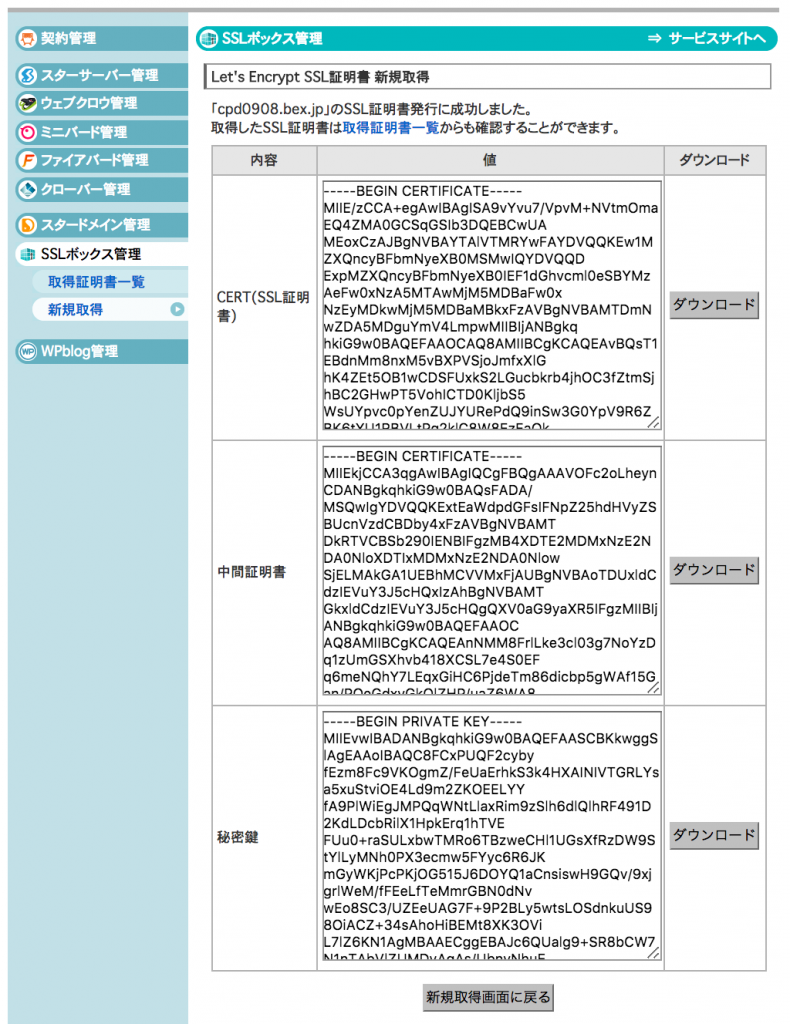
⑥ The certificate was issued.

⑦ On the CORESERVER SSL settings screen, copy and paste the issued information into the respective fields. (*Leave "① Private Key [with Passphrase]" and "① Passphrase for the above Private Key (Required)" blank.) Click the [Install SSL Certificate/Intermediate Certificate] button.

⑧ A few hours later, the publication was completed and the SSL connection was established.
Let's Encrypt certificates are valid for three months from the date of issue. You will receive an email notification from SSL Box before the certificate expires. If you wish to continue using the certificate, simply follow the instructions in the email and repeat step 2.
SSL Box, which allows for easy and convenient encrypted communication without the need to build a certificate authority using Let's Encrypt, is an extremely useful tool. Currently, Value Domain (GMO), the operator of CORESERVER, seems to be working to make free custom SSL available for all server plans. Nowadays, encryption is increasingly required in development environments, and it may not be long before encrypted communication on the internet becomes the industry standard.